Page
Install and configure the Ansible extension in Visual Studio Code

Ansible VS Code extension is easy to set up and you can customize it to suit your own needs.
In this lesson, you will:
- Learn about the Ansible VS Code extension.
- Learn how to activate and use Ansible VS Code extension.
What is Visual Studio Code (VS Code)?
VS Code is a source code editor that runs on your desktop and is available for Windows, macOS, and Linux.
Why use the Ansible VS Code extension?
Utilizing the Ansible VS Code extension capitalizes on VS Code's widespread adoption and sophisticated ecosystem, offering an integrated environment where developers can efficiently write, run, and debug Ansible content. The extension harnesses VS Code's editing, navigation, and debugging tools tailored for Ansible to ease content development, making it a logical choice for automation.
How to install the Ansible VS Code extension
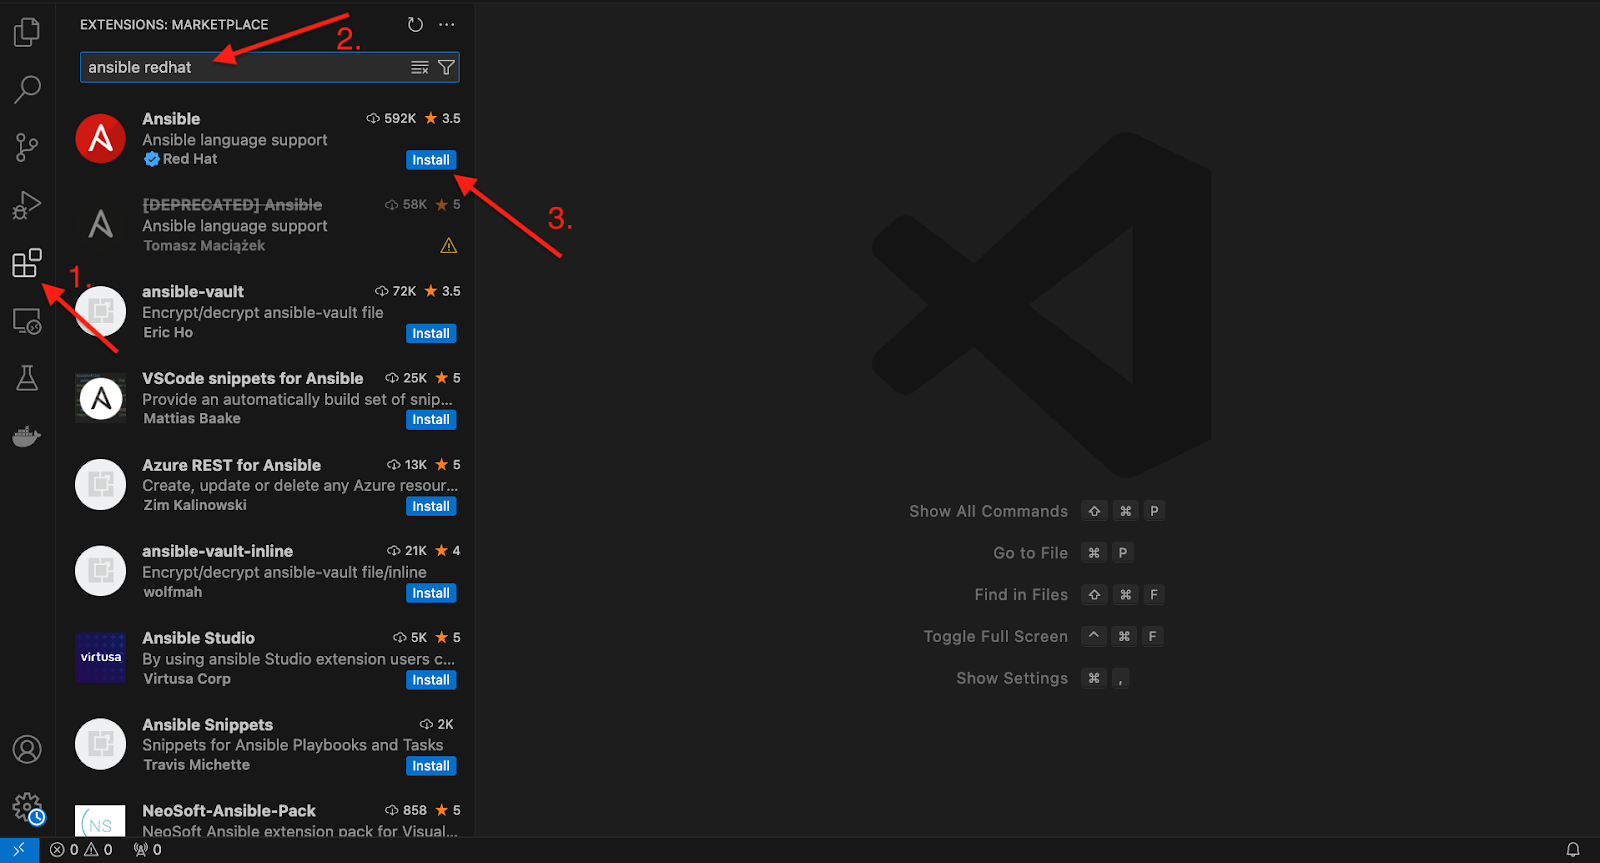
In the VS Code extensions marketplace, search and install ansible redhat (Figure 1).
Info alert: When the extension is installed for the first time, the runtime status is "Not yet activated" which indicates that the extension is not yet running. The status will be activated only after a file is opened in the editor and the language identified for the file is Ansible.
For Windows users, the extension works with WSL2 and not on native Windows.
Ansible VS Code extension settings
The Ansible extension supports multiple configuration options. This allows the user to, for instance, change the executable path for Ansible, ansible-lint, the Python interpreter, and so on. There is also an option to enable the automation execution environment. Users can choose the container engine, image name, pull policy, and more.
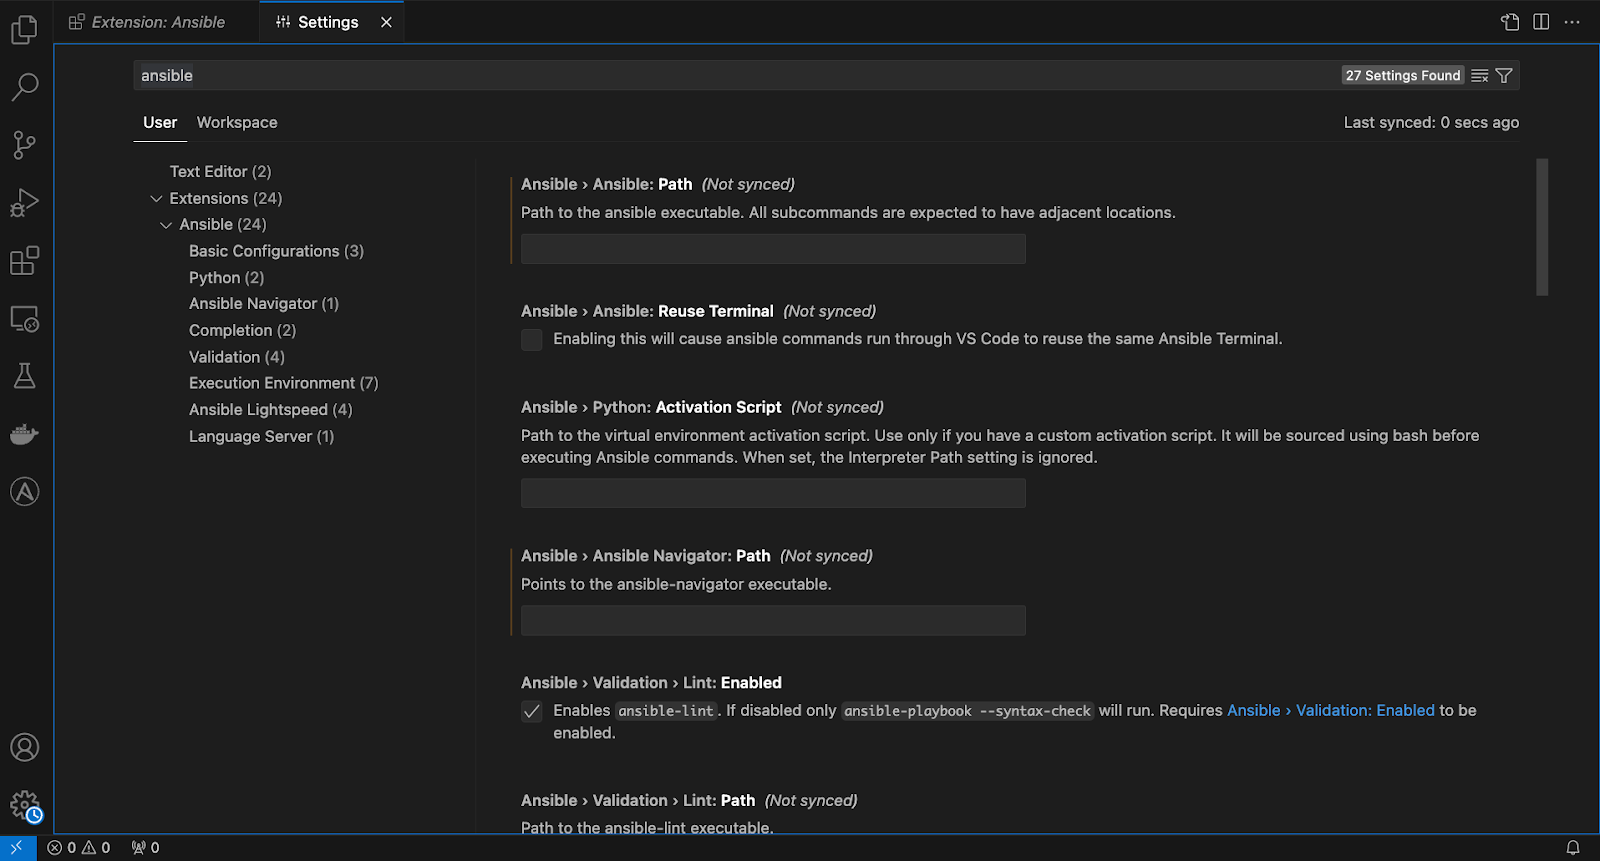
To see and change the configuration options in the VS Code window, go to Code -> Settings/Preference -> Settings and in the Search settings box (Figure 2), type ansible.
Workspace settings versus user settings
You can set preferences for a given user or workspace, and depending on the environment, also for remote type and workspace folder. User-based settings are applied globally for any instance of VS Code that is opened. Workspace settings are stored within your workspace and only apply when the current workspace is opened. For more information, refer to the VS Code documentation.
Alternatively, for workspace settings, you can also provide the Ansible settings by editing the .vscode/settings.json file within the workspace root folder (Figure 3).

The choice between workspace settings and userspace (user settings) in VS Code depends on the context and needs of your projects. Here's why you might consider workspace settings to be better in certain scenarios:
- Project-specific configuration: Workspace settings are stored with your Ansible project, allowing you to define and maintain configurations that are specific to that project. This means that any special settings or extensions needed for the project won't interfere with your general VS Code environment or other Ansible projects.
- Team collaboration: When working on a shared project, workspace settings help ensure consistency across different team members' environments. By committing workspace settings to your version control system, you can make sure every team member has the same configuration, reducing "works on my machine" problems.
- Avoiding configuration conflicts: By using workspace settings, you can avoid conflicts between Ansible project-specific configurations and your personal preferences in the user settings. This way, you can customize your Ansible development environment for individual projects without altering your preferred setup for other work.
- Flexibility and control: Workspace settings provide flexibility, allowing you to switch between different projects with their unique configurations seamlessly. You can have different settings for a Python project, an Ansible project, and a C++ project, each optimized for the respective stack without the need to manually reconfigure settings each time you switch projects.
Activating and using the Ansible VS Code extension
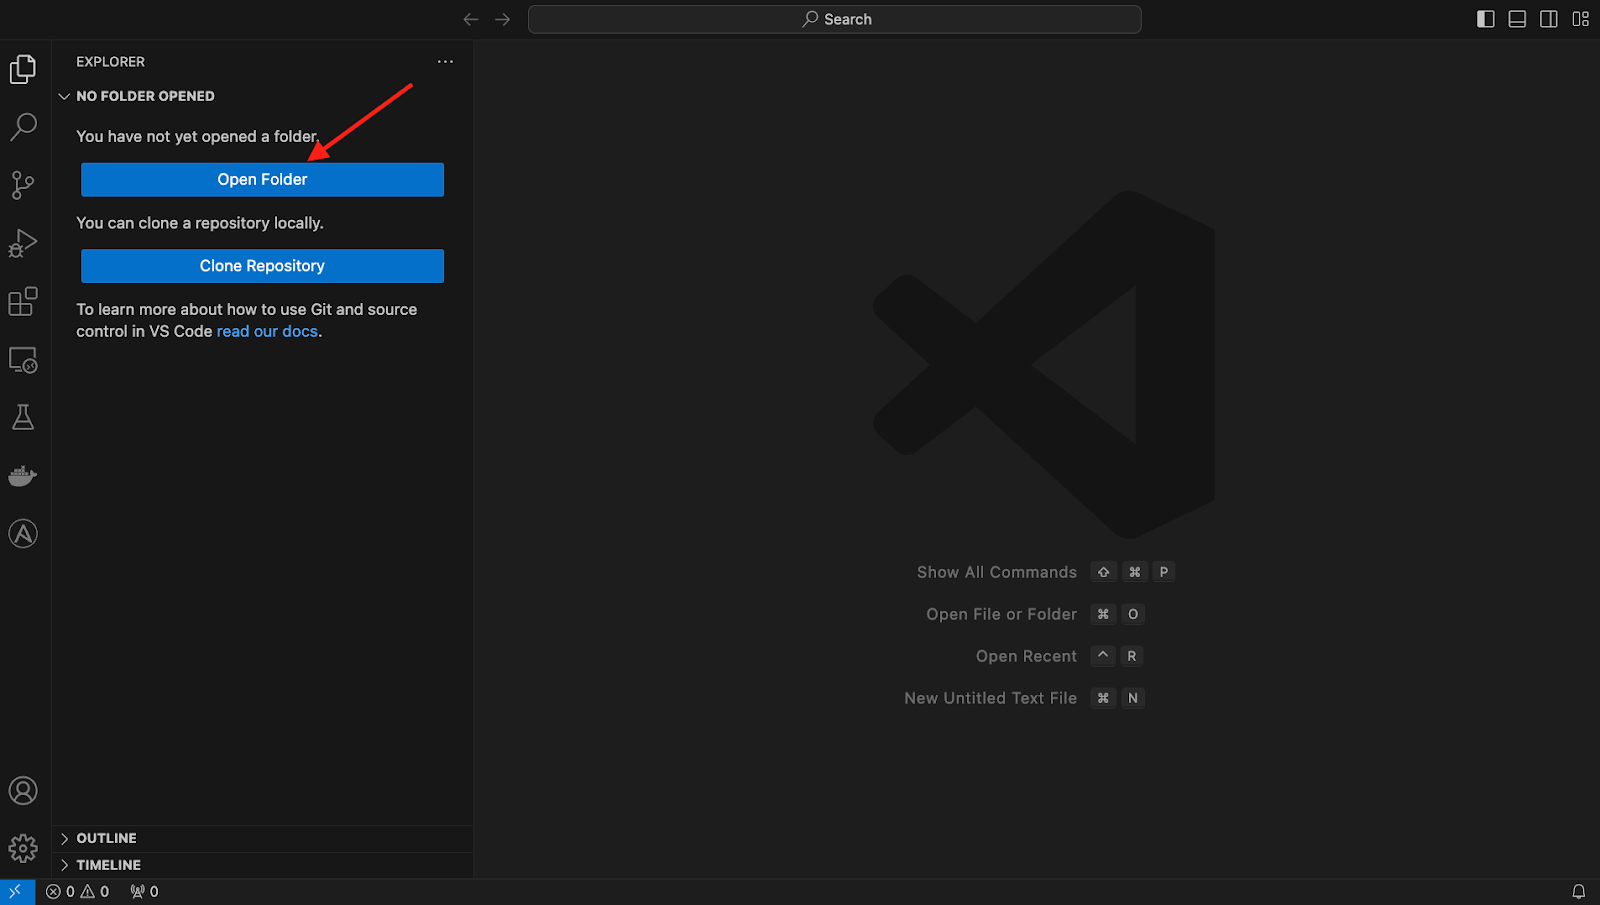
Now that you've installed the Ansible extension in VS Code, the next step is to either open an Ansible project or create a new Ansible playbook project.
To open an Ansible project, follow the steps shown in Figure 4.
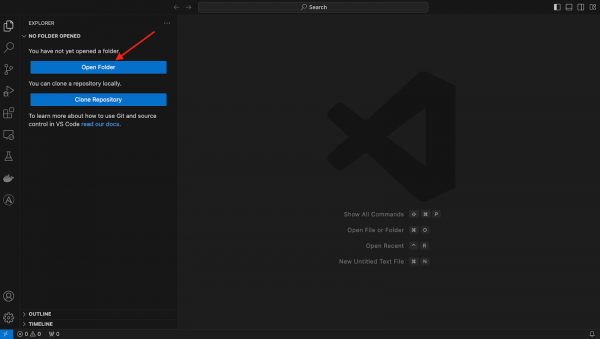
Figure 4: Click Open Folder to create a project in Visual Studio Code. - Open the directory that contains your Ansible playbooks by clicking Open Folder.
- Ensure that the Ansible playbooks within your project are recognized as playbooks for the Ansible extension to work. Ansible playbooks are YAML files, so the YAML extension within VS Code recognizes them as such. There are a few ways to ensure that the playbooks are assigned the Ansible language, including:
- YAML files under
./playbooksdir. - Files with the following double extension:
.ansible.ymlor.ansible.yaml - Notable YAML names recognized by Ansible like
site.ymlorsite.yaml - YAML files having playbook in their filename:
*playbook*.ymlor*playbook*.yaml
- YAML files under
Additionally, in VS Code, you can add persistent file association for language to
settings.jsonfiles like this:{ ... "files.associations": { "*plays.yml": "ansible", "*init.yml": "yaml", } }You can also manually associate the Ansible language to the file if the file is recognized as a YAML file. Follow the instructions associated with Figure 5.
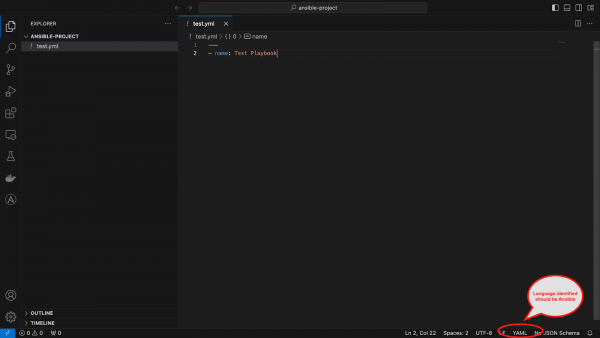
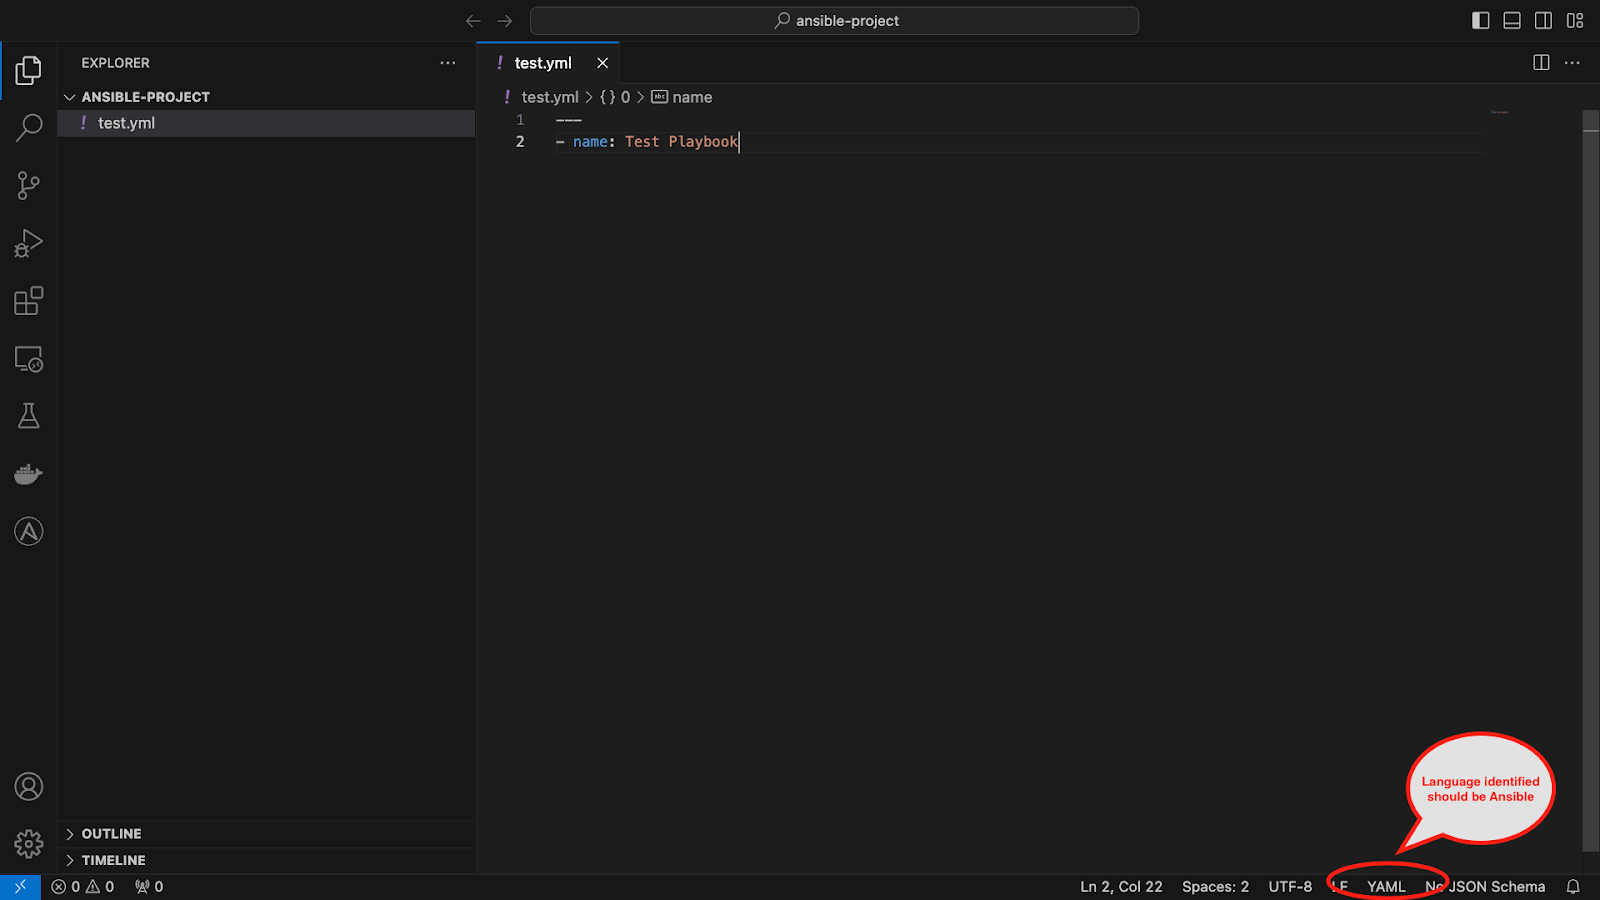
Figure 5: Visual Studio Code language selection. - Hover the cursor on the language identified (YAML in this case) in the bottom right corner. You will see Select Language Mode.
- Click the identified language name (YAML) to open a drop-down menu.
Type
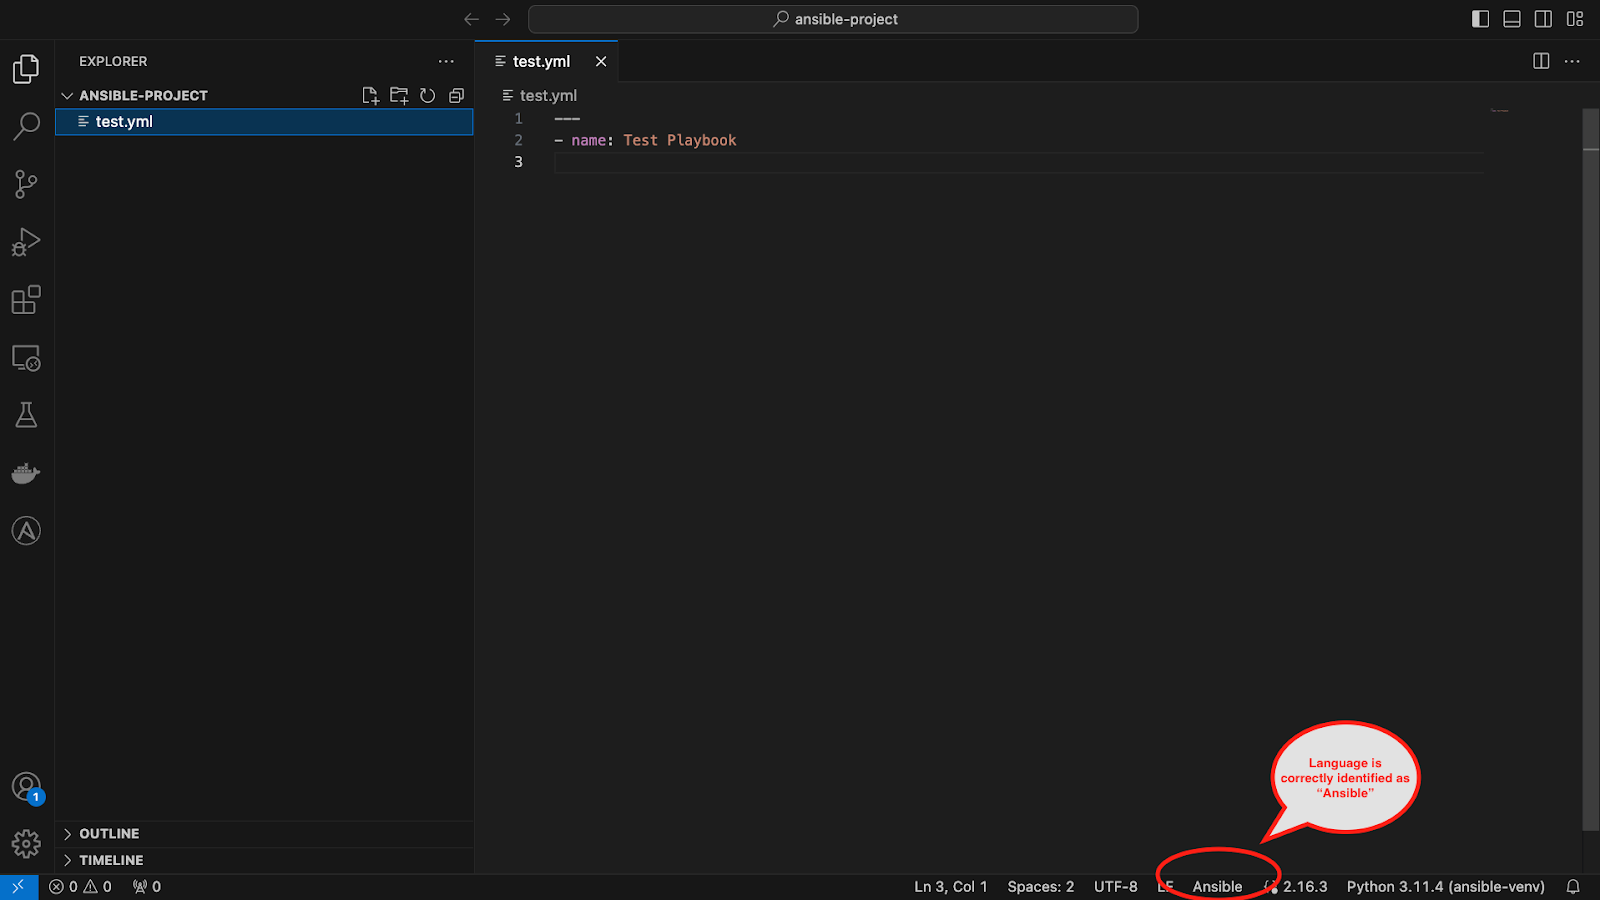
Ansiblein the tab and then select it. After doing this, the identified language for the file is changed toAnsible(Figure 6).
Figure 6: Visual Studio Code Ansible language selection. - When a file is recognized as Ansible, the Ansible VS Code extension provides specific features for creating Ansible playbooks and task files, such as auto-completion, hover, diagnostics, goto, and more. The extension also relies on the Red Hat
vscode-yamlextension to provide auto-completion and diagnostics information of other related files like Ansiblevarsfiles,ansible-navigatorsettings files,ansible-galaxyrequirements and metafiles,ansible-lintconfiguration files, and other YAML files.
Set up your Ansible development environment
A set of tools is provided with Ansible Automation Platform to help automation creators to create, test, and deploy collections containing playbooks, roles, modules, and plugins.
Install the Ansible development environment
These packages are available via the Ansible Automation Platform setup bundle as RPM packages. The Red Hat recommended way is to set up these tools as part of your Python virtual environment inside the Ansible project workspace. First, install these RPM packages using the steps below.
Open the terminal in VS Code. Go to Terminal -> New Terminal in the toolbar and enter:
$ dnf config-manager --enable ansible-automation-platform-2.4-for-rhel-8-x86_64-rpms

$ dnf install ansible-core ansible-navigator ansible-lint ansible-builder
Follow the steps below to set up the packages in your workspace:
# setup a venv called project-venv with system site-packages

$ python3 -m venv --system-site-packages project-venv

$ source project-venv/bin/activate
Info alert: Make sure the Python interpreter used to initialize the virtual environment is the same as the system default. You can run the
pip freeze|grep ansiblecommand to check if all required developer tools are part of your virtual environment.- Point the Python interpreter in VS Code to the one in the virtual environment. This ensures that all the required developer tooling comes from the correct location.
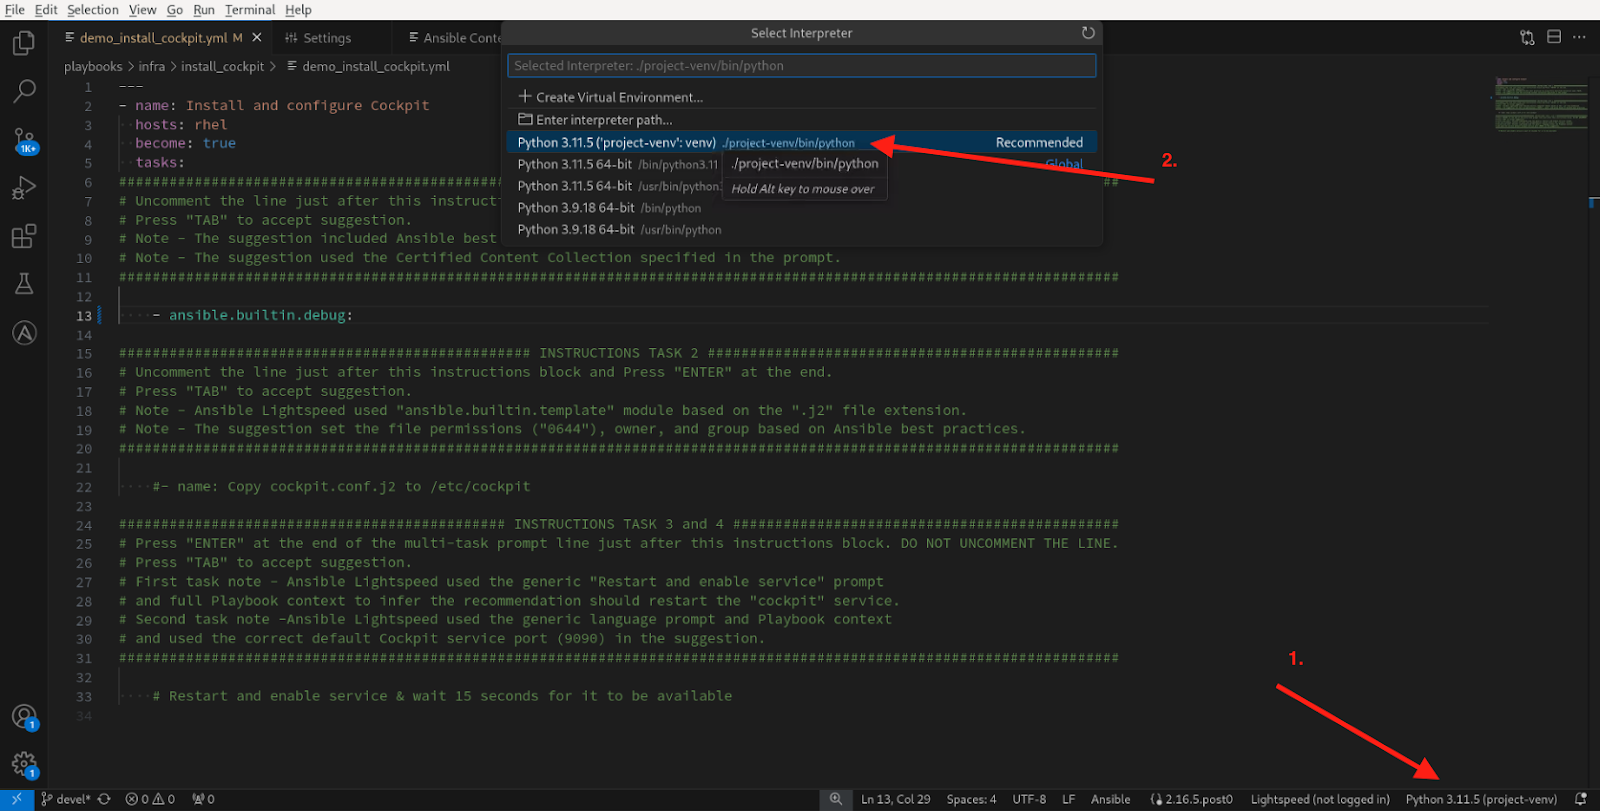
Now you can start working on your Ansible project using the Ansible VS Code extension (Figure 7).
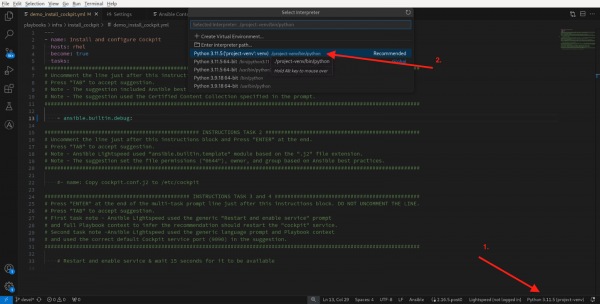
Figure 7: Visual Studio Code Python interpreter.
Use automation execution environments
Prerequisite: Install a container engine such as Podman or Docker on your workstation.
To list the automation execution environments supported by the extension, open the VSCode settings (Code -> Settings/Preferences -> Settings) and type ansible.execution environment (Figure 8).
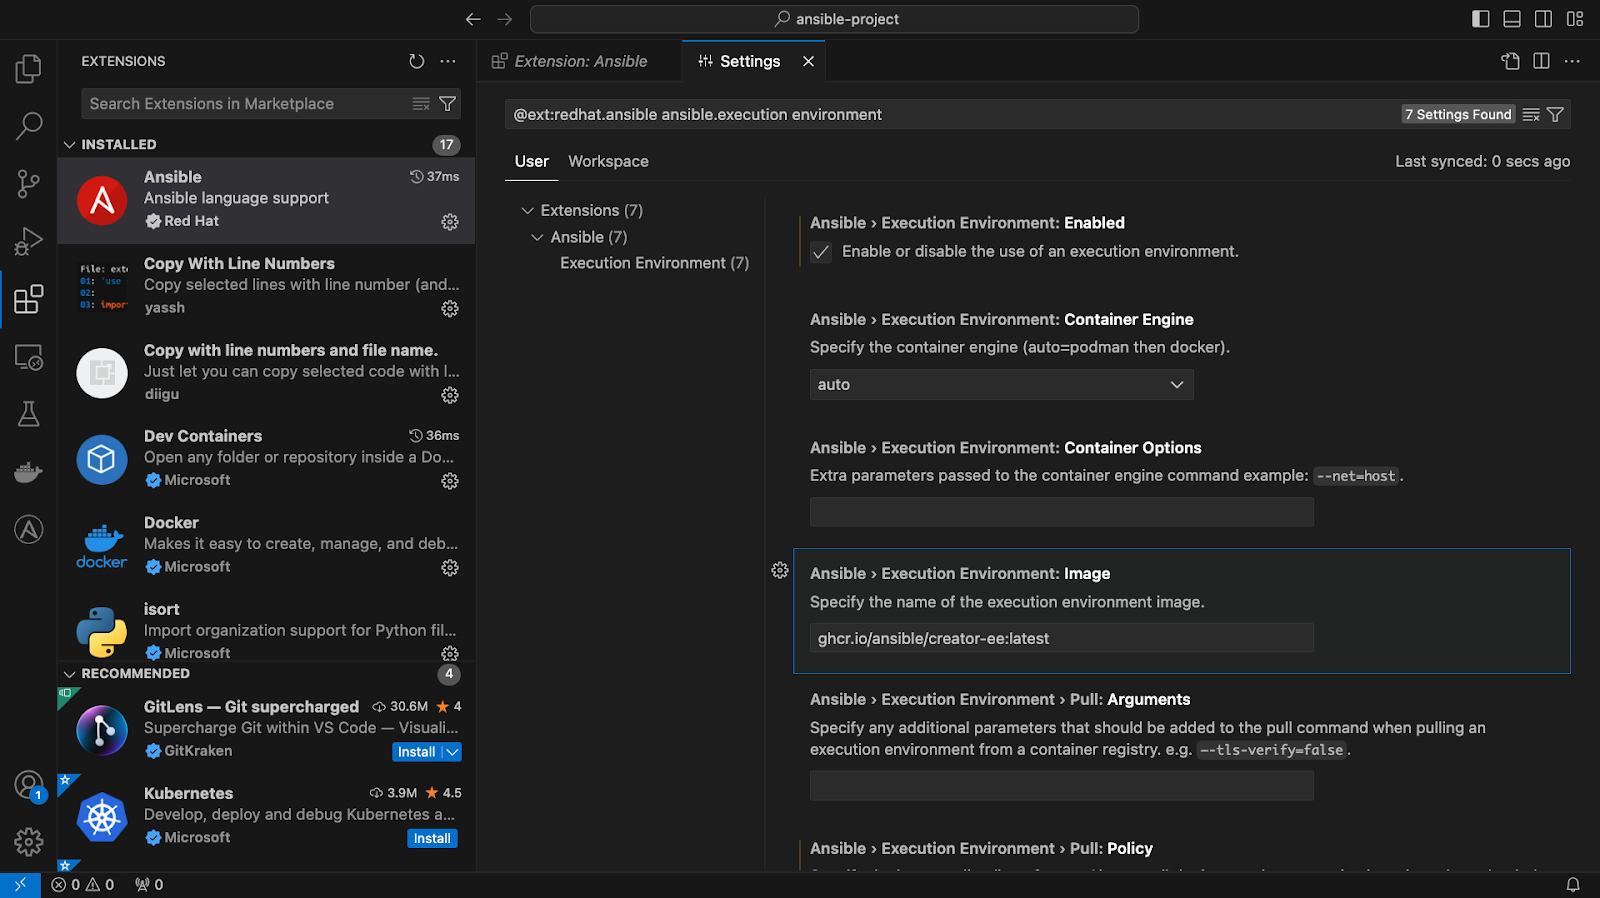
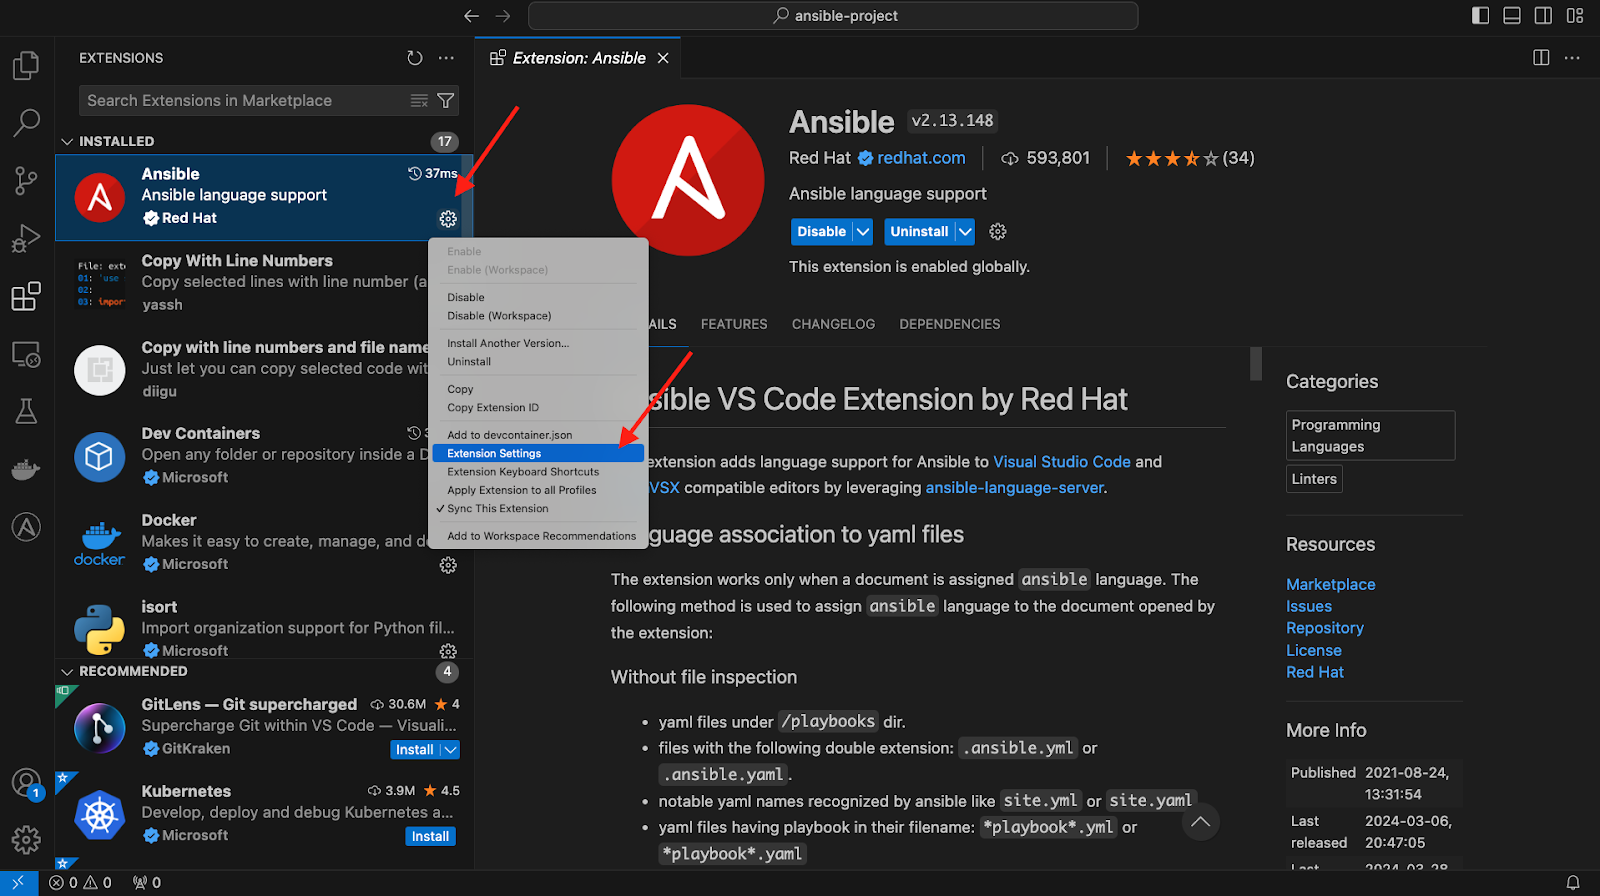
Info alert: Alternatively, you can click the Ansible extension in the extension marketplace and then click the gear icon to open the extension settings. See Figure 9.
After enabling the execution environment (EE), the extension will pull the ghcr.io/ansible/creator-ee:latest image by default, if it is not present locally. The value of the image can be changed by providing the intended value for ansible.executionEnvironment.image setting. After the EE pull is successful, the Ansible extension will copy the plug-ins docs from within EE to the local cache folder and it will be used to provide auto-completion, hover and goto functionality. Since the creator-ee image has ansible-lint bundled, the Ansible extension and ansible-language-server will volume mount the entire workspace within the EE and run ansible-lint or ansible-playbook-syntax-check based on settings to provide diagnostics information in editor.
