

In the early days of software, developers built applications by grouping all components into one self-contained code base for easy management — the monolithic approach. Then, the technology evolved from large codebases to smaller microservices, distinct components that collaborate like a specialized team.
Pedal, an app to buy bikes, embodies this transition. It’s evolving from a monolith to a network of independent microservices. However, it’s challenging to manage, monitor, and coordinate all these microservices efficiently.
Application programming interface (API) management tools help monitor and control multiple microservices from a central location while enhancing security. Like team captains, these tools help microservices collaborate while retaining their individual capabilities.
Our previous article demonstrated splitting the monolithic Pedal app into microservices. In this tutorial, you’ll enhance the Pedal application by transforming its user management service into a microservice that performs create, read, update, and delete (CRUD) actions on the database. You’ll also integrate Red HatⓇ 3scale API Management into the data service, equipping the app with a robust tool for improved performance and security.
Prerequisites
- Signup for a 3scale API Management free evaluation for managing your APIs that run the microservices. It’s free to try for 90 days.
- Get the Pedal application up and running on your computer. If you require help doing this, you can find instructions in the repository.
Identifying the requirements for API management in your microservice
Let’s explore what your Pedal application requires for API management.
As Pedal’s User-Service microservice adds and updates sensitive user-related data, you must limit which users and services can access private information. The microservice requires security measures to keep data safe, rate limits to prevent being overwhelmed by requests, and access control to limit which users can use it. All microservices that handle private information will require similar controls.
Adding Red Hat 3scale API Management to your microservice
You can set up the Red Hat 3scale API Management platform on premise, in the cloud, or its hosted environment. This tutorial uses the hosted environment for its straightforward setup process.
Set up your microservice
The Pedal application’s Git repo currently displays two microservices. We’ll use the User-Service microservice for this demonstration. This microservice acts as a representational state transfer (REST) API, enabling the application to interact with user data. This modular approach lets you manage your application’s user data without interfering with other components.
Set up and configure the microservice to run locally on your machine with the following REST API endpoints available
Endpoint | Method | Action |
http://localhost:9000/api | GET | Acts as the base URL for integration. |
http://localhost:9000/api/user | GET | Lists all user data in the database. |
POST | Adds a new user to the database. |
You’ll integrate these endpoints into the Red Hat 3scale API Management platform.
Important note: This tutorial assumes you are using an on-premise version of Red Hat 3scale. If you use a cloud-based version, deploy your microservices to be available via the Internet. In this case, replace the localhost URLs with your service’s public URLs.
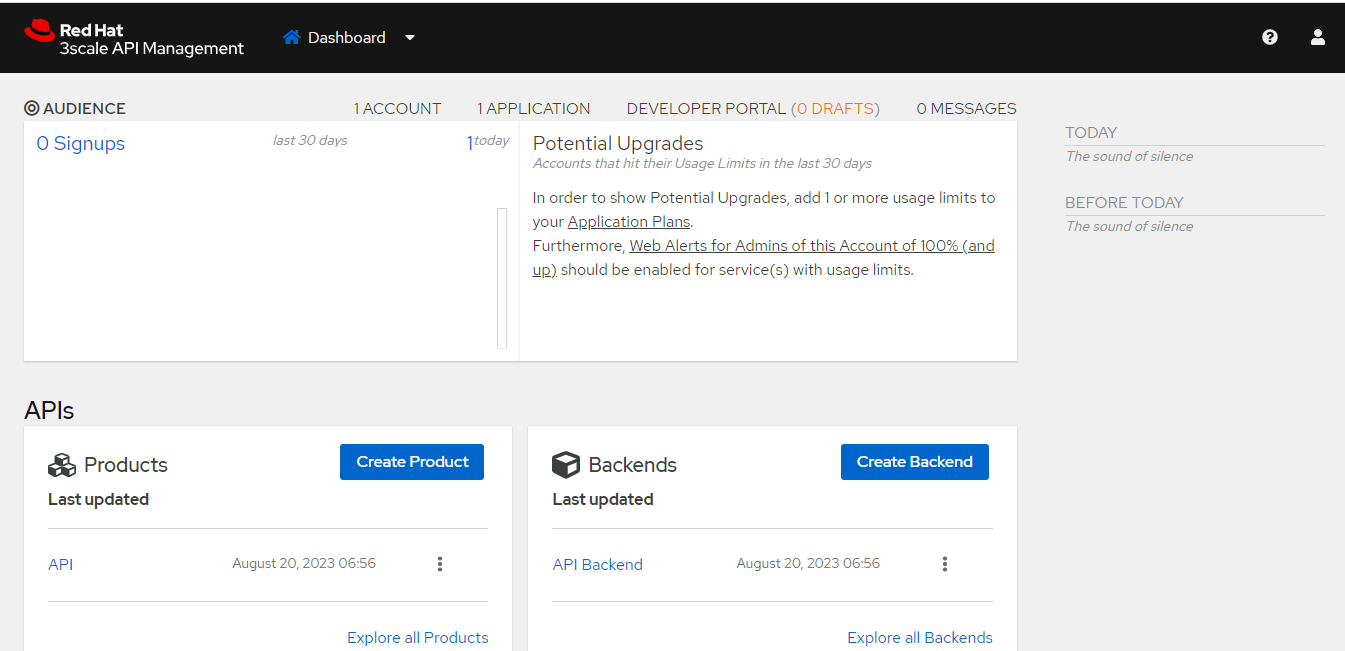
Log into your Red Hat 3scale API Management admin dashboard
First, navigate to your Red Hat 3scale API Management admin dashboard. Once you log in, you’ll find a user interface resembling the layout below, with audience information and a section to create product or backend APIs.
Create a new product
Next, create a product — the API that customers interact with. This API enables you to establish application plans and define rate limits.
First, navigate to your dashboard and click Create Product. Note: You can only make one product using the free version.
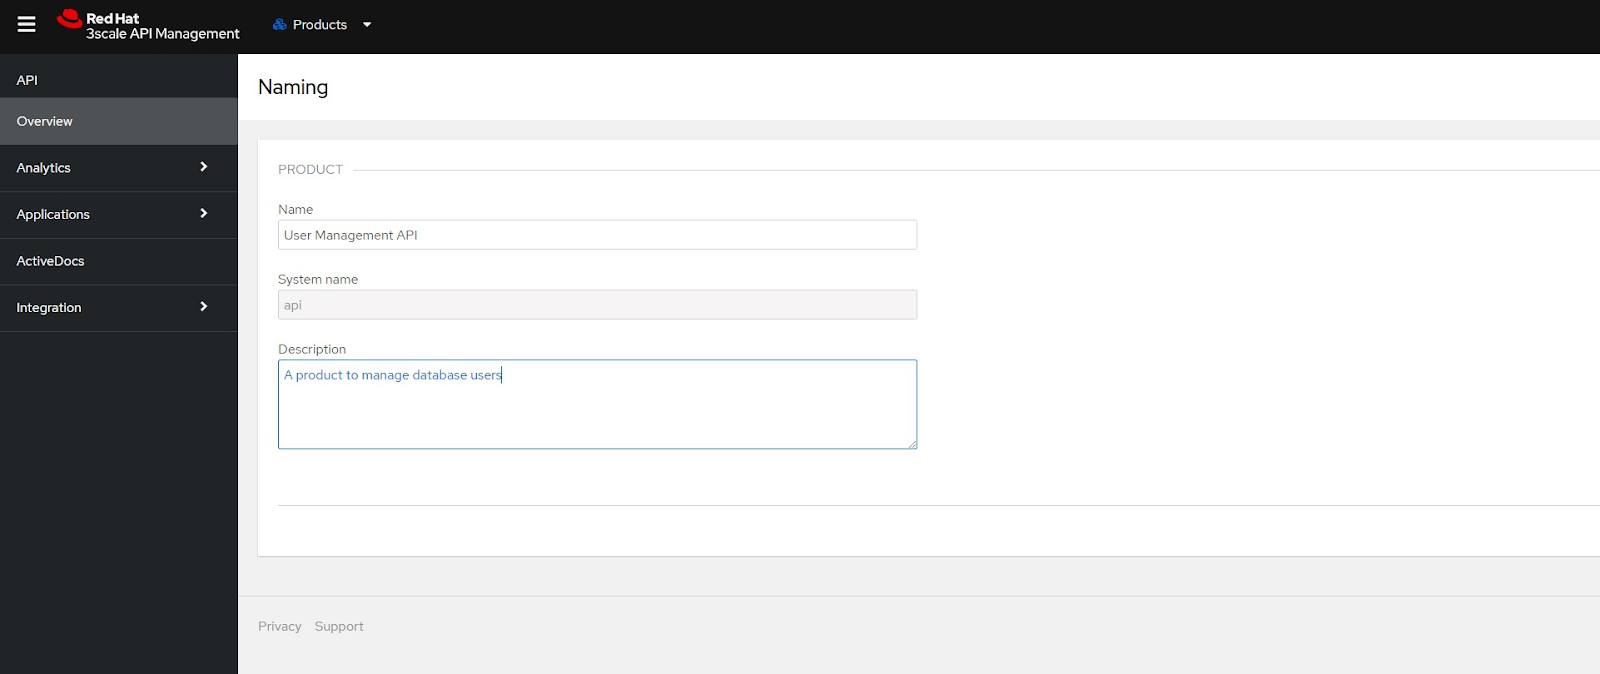
Now, name your API product and enter a description in the window that appears. Then, click Update Product.
Create the backend on Red Hat 3scale API Management
A backend functions as an internal API, helping you generate products for API management.
On your dashboard, click Create Backend to create a backend. In the form that appears, provide a name and description. In the Private Base URL field, enter your API microservice’s URL — in this case, http://localhost:9000/api. Finally, click Create Backend.
Add methods to the backend
After creating the backend, add the methods you want to integrate.
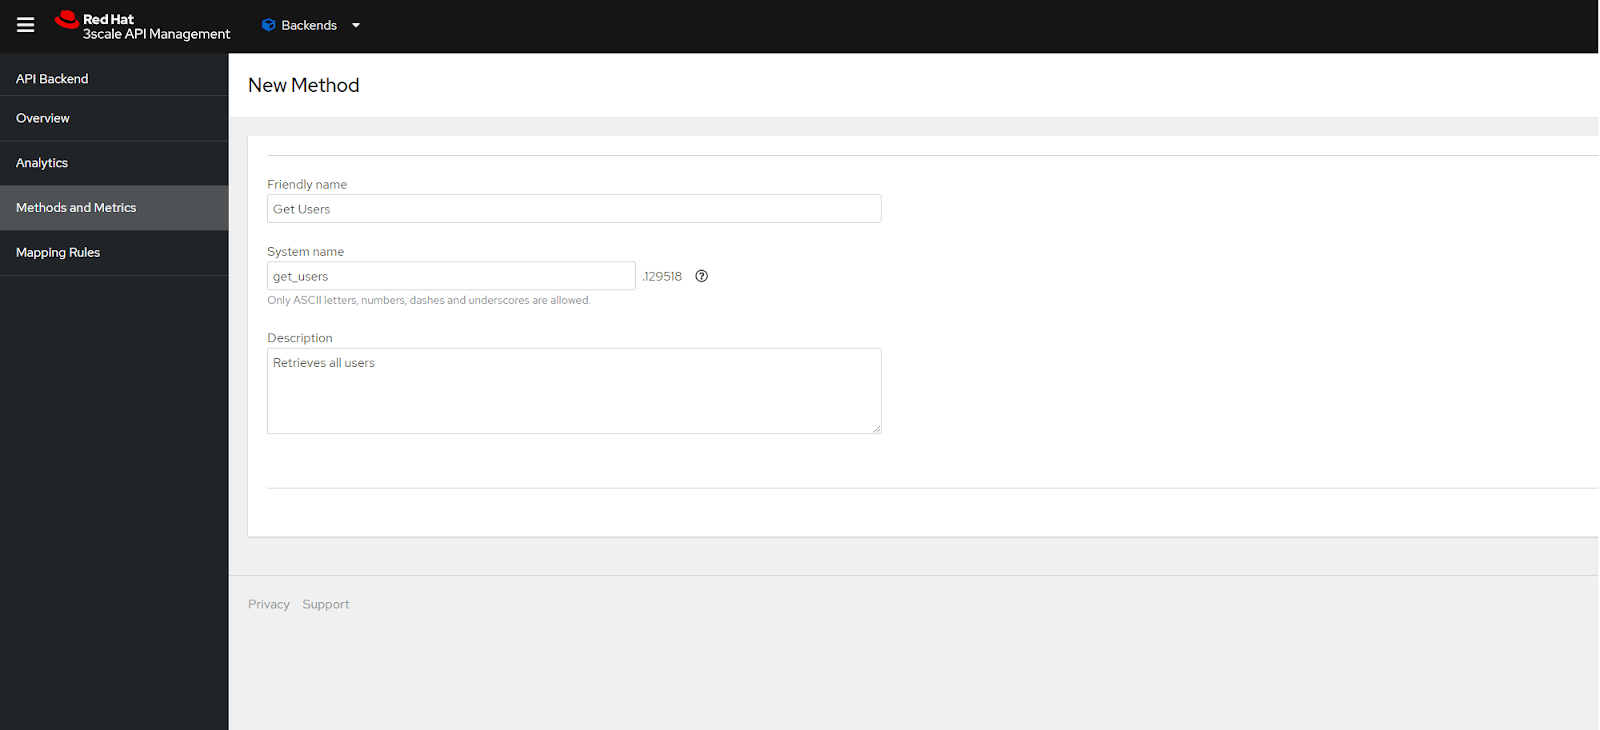
- First, in the sidebar, click Methods and Metrics.
- Then, click Add a method. Type the new method’s Friendly name, System name, and, optionally, Description.
- Finally, click Create Method.
Repeat the same steps to add the second method. Use Add User for its Friendly name.
Define mapping rules for the backend
Your final step to set up the backend is defining mapping rules for endpoints.
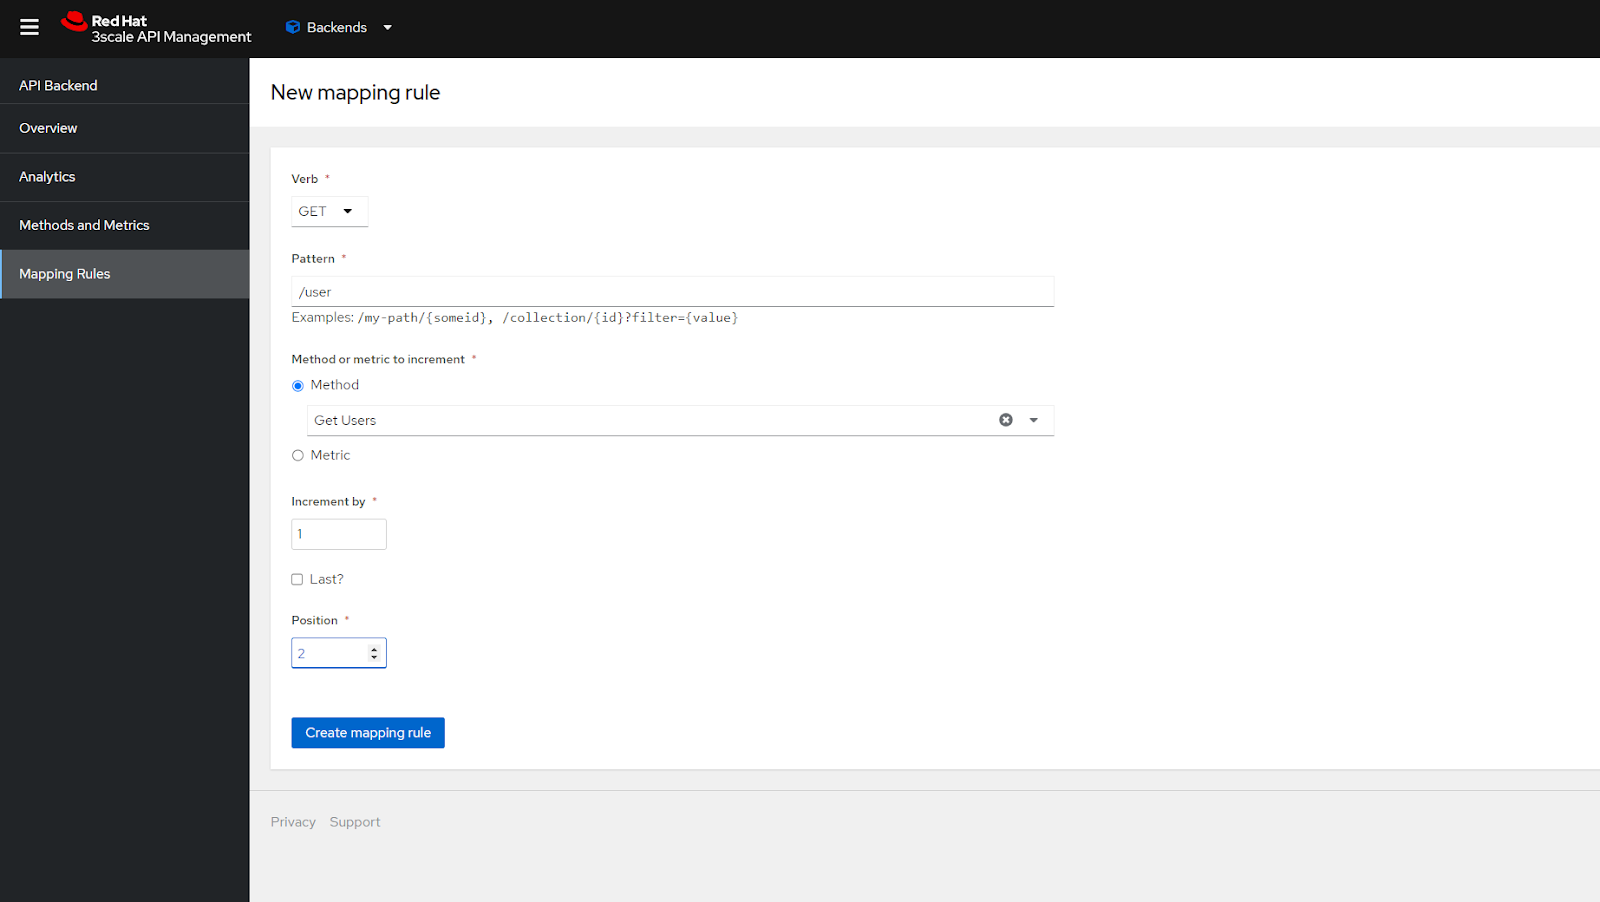
- First, on the sidebar, click Mapping Rules.
- Next, click Create mapping rule.
- Finally, configure the settings to match your endpoint.
In this case, the settings are the following.
- Verb: GET
- Pattern: /user
- Metric or Method to increment: Get Users
Keep the remaining default settings.
- Increment by: 1
- Last?: Unchecked
- Position: 2
Repeat the same process to create a mapping rule for the second endpoint.
You’ve set up and defined your application’s backend in Red Hat 3scale API Management. Now, you can manage your APIs to ensure smooth communication within your microservices architecture.
Integrate the backend with your product
First, navigate to your product’s page in the Red Hat 3scale API Management dashboard. Next, navigate to Integration and select Backends. Then, click Add Backend. In the list, choose the backend you already created. Specify the path, in this case, the default (/). Finally, click Add to Product.
Set up authentication
Red Hat 3scale API Management supports various methods to authenticate requests, including OAuth with OpenID Connect and API keys. OAuth offers robust user authentication and authorization capabilities. API keys provide a more straightforward authentication method, authorizing access using the user or application’s unique key.
To ensure the API’s security here, use API keys. First, navigate to the product page to configure how to authenticate your APIs. Next, navigate to Integration and choose Settings. Then, pick your authentication method, API Key (user_key).
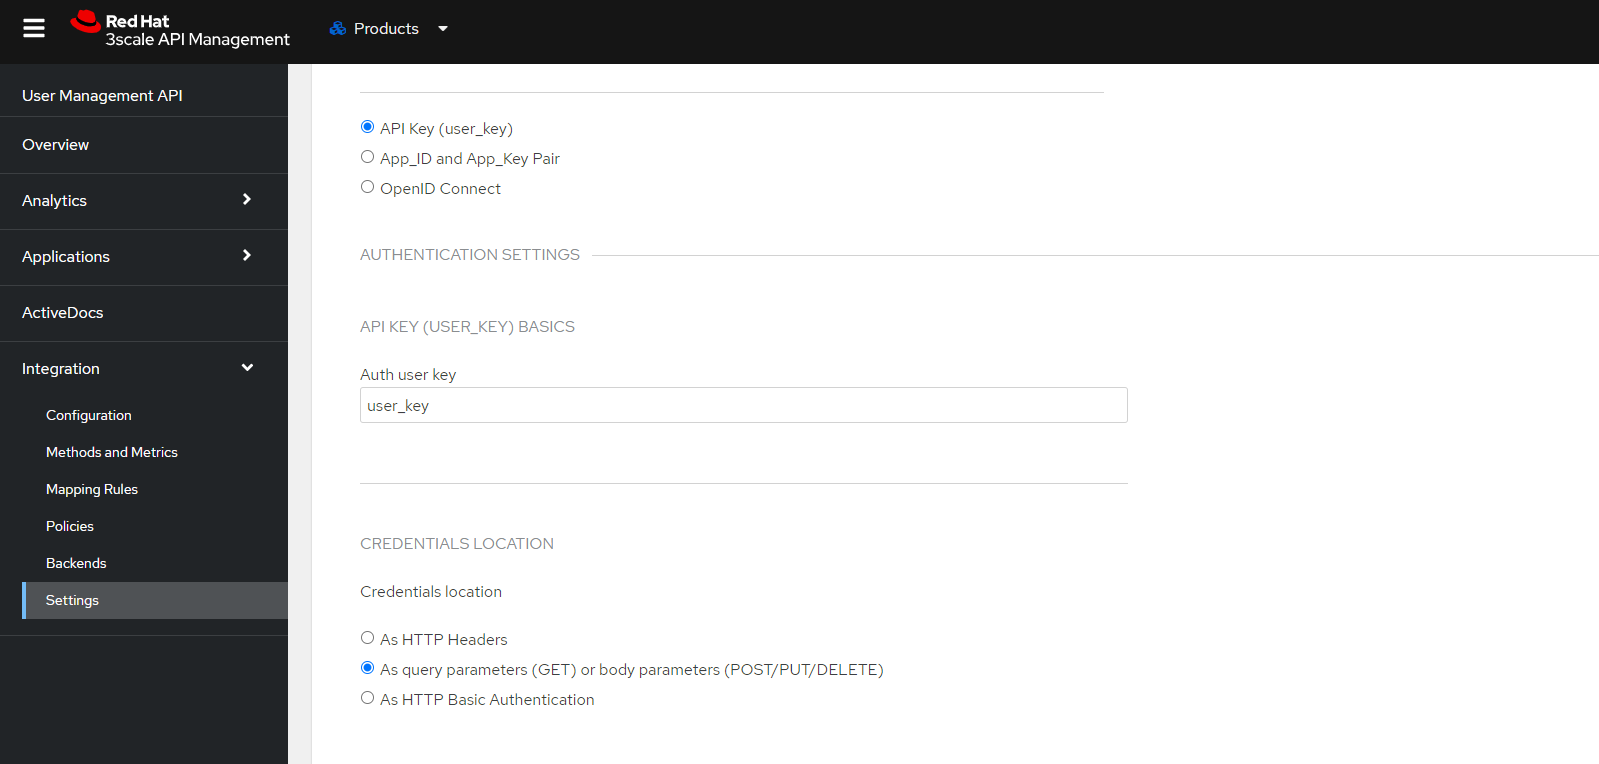
Finally, scroll down the page and click Update Product.
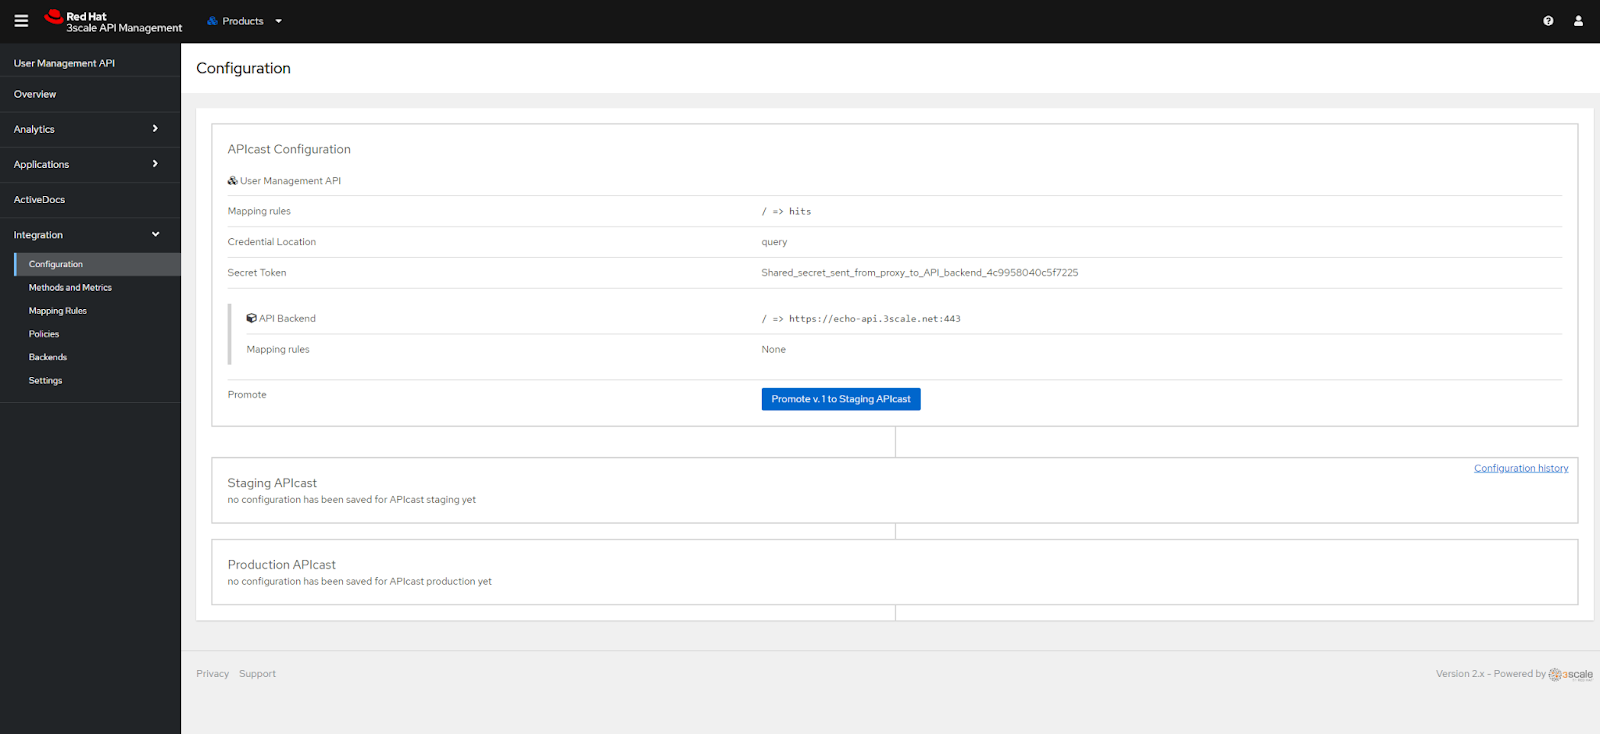
Promote and test the integration
Before testing, move your new APIcast configuration to a staging environment. APIcast is a Red Hat 3scale gateway to manage API traffic and enforce management rules.
First, navigate to your product’s page in the Red Hat 3scale API Management dashboard. Click Integration and choose Configuration. Finally, within the APIcast Configuration section, select Promote v. (n) to Staging APIcast.
After promoting your API to the staging environment, the platform displays a URL and an example curl command, like the following screenshot.

To conduct a test, copy and paste the example curl command into a web browser’s address bar. Observe the response, which should be similar to the following screenshot, with full names, usernames, email addresses, creation dates, passwords, and user roles.

Try modifying the example’s user_key and see what happens. If you receive an Authentication Failed error, it means that your integration is functioning as intended.
Configuring rate limiting and access control
Rate limiting and access control are two critical aspects of API management. Rate limiting caps how often an action can happen. In this case, it ensures users don’t overuse your microservice in a short time. This restriction prevents straining the microservices and underlying infrastructure, which helps maintain system performance.
Access control determines who can use the microservices and restricts it to authorized users and systems. You’ll set up and enforce these rules using Red Hat 3scale API Management.
Let’s now create an application plan to configure access control and rate limiting in Red Hat 3scale API Management. It defines your product’s rules, such as limits, pricing, and features.
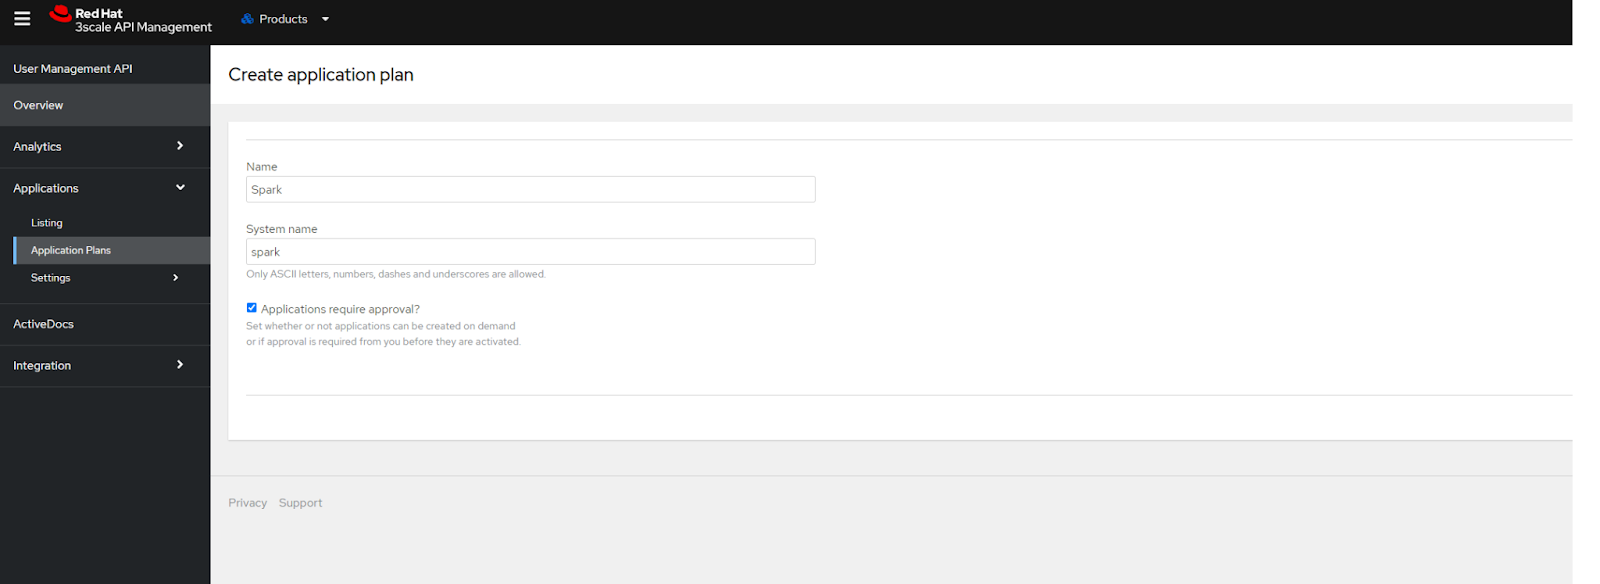
Create a new application plan and configure access control
First, navigate to the product’s page in the Red Hat 3scale API Management dashboard. Then, in the sidebar, click Applications, then Application Plans.
To configure access control, mark the checkbox next to Applications require approval? Finally, click Create Application Plan.
Configure rate limiting
On the Application Plans screen, click the new application. Then, in the Metrics, Methods & Limits section, navigate to Backend Level and choose the product backend you created. In this case, it’s Pedal backend.
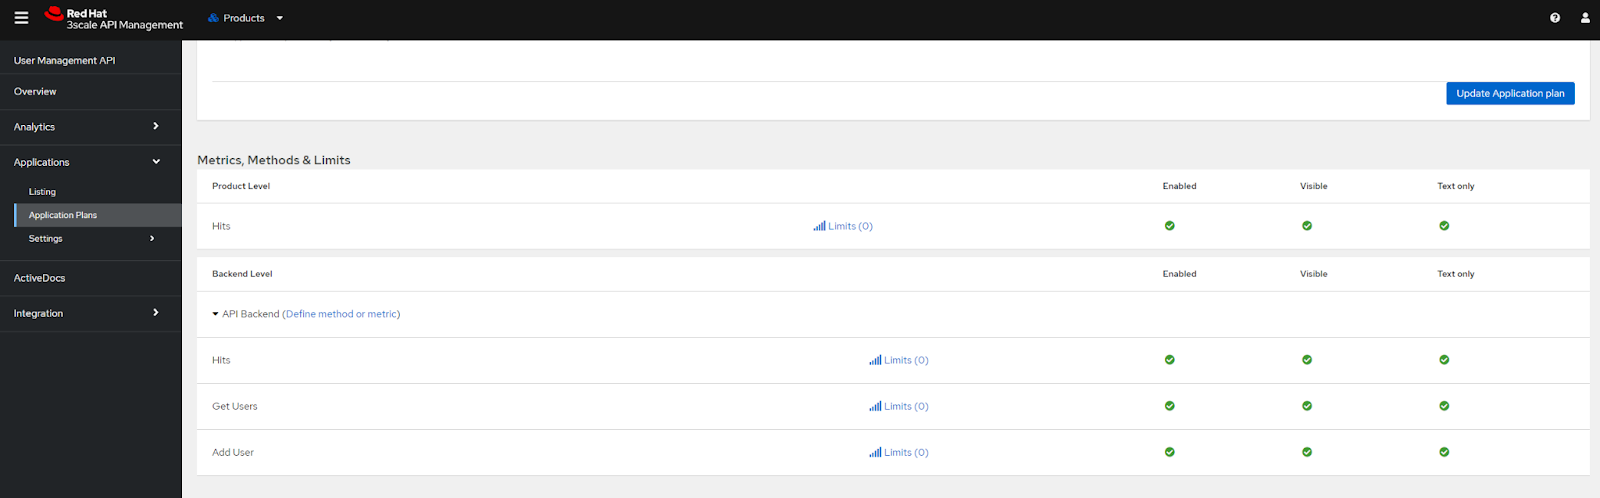
To apply rate limiting to the Get Users method, click Limits, then New usage limit. In the New Usage limit pop-up, define your desired limit. In this case, select day for Period and 100 for Max value.
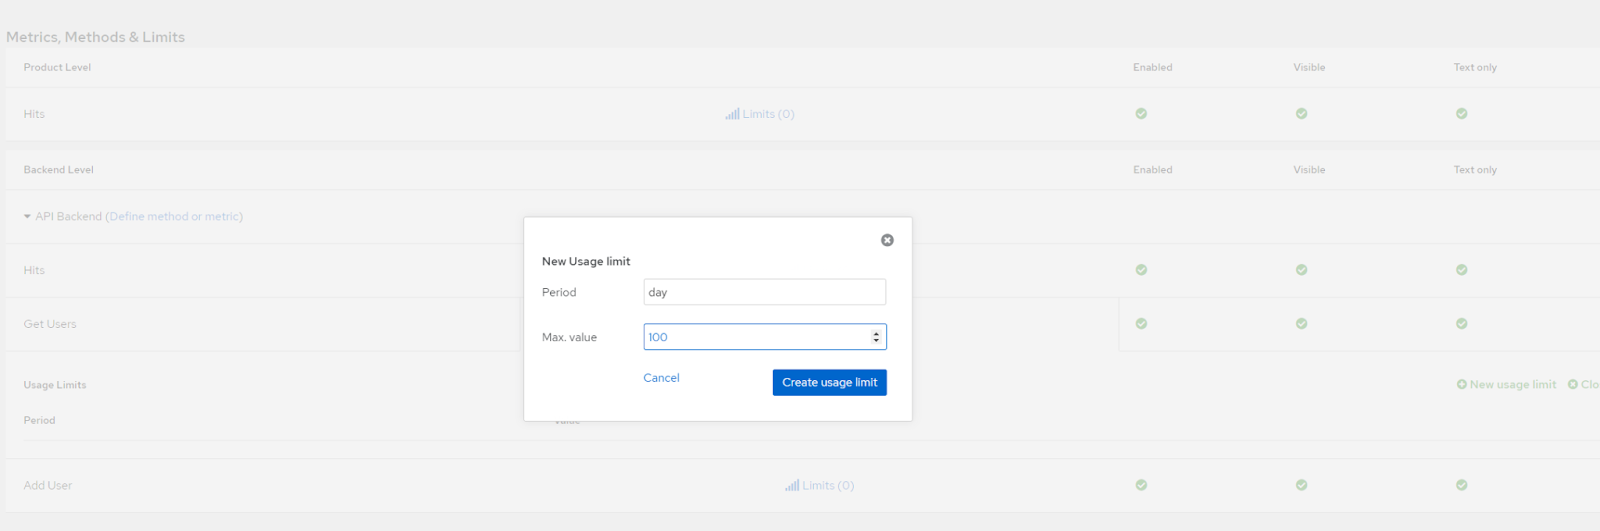
Next, click Create Usage limit. Finally, click Update Application Plan.
The new application plan limits how many people can use your API and how many times they can use it daily. Your users can subscribe to this plan. It’s like having a special pass to use your app in a specific way.
Monitoring and analyzing API usage
By monitoring and analyzing how applications use your API, you can gain valuable insights and make necessary adjustments to enhance performance.
Use Red Hat 3scale API Management analytics
Red Hat 3scale API Management helps you gather and study data about how applications use your API. You can track essential metrics like traffic, daily averages, top applications, alerts, and integration errors.
You can create detailed reports and visual displays to understand how well your API is performing. The information helps you recognize patterns, spot possible issues, and make informed decisions to enhance your services using actual data.
Let’s check your analytics using Red Hat 3scale API Management. First, navigate to your product’s page. Next, click Analytics on the sidebar, then Traffic. You should get a graph with traffic numbers throughout the last 24 hours, like the following image.

Use this information to improve how you provide your services. You can optimize your resources, adjust rate limits, and resolve performance issues by spotting bottlenecks and usage trends. For example, if the peak traffic in the screenshot above strains during a specific endpoint, you can adjust your resources at that time of day to prevent slowdowns.
Analytics help you make informed decisions that enhance microservice efficiency, user experience, and reliability.
Next steps
Managing your APIs helps microservices work together while keeping your application secure via tools and settings. Red Hat 3scale Application Management’s easy-to-use setup and various features make managing microservices straightforward.
